Table of contents
- Example active heading
- Example heading


Ninety-nine percent of consumers search for and find small businesses on the internet. If you don't have a website, it can be challenging for your customers to learn about your business, and you'll be limited in the types of digital marketing promotions you can do. A website gives your audience a place to go and learn more about what you have to offer and buy your products—and that makes building a website for your business (if you haven’t already) a top priority for every business owner.
We'll cover two different ways you can build a website. Both have advantages and disadvantages, so your business goals will determine the best option.
The first option is a website builder—a program where you can quickly build a website without any design or coding experience needed. Website builders tend to be cheaper; some even offer free website plans. They typically have pre-made templates and drag-and-drop features to make it easier to create your website. However, despite being very beginner-friendly, website builders are typically limited when it comes to customizations and growth.
| Pros | Cons |
| Beginner-friendly No design or coding experience needed Less time-consuming Can be free or at least cheaper | Limited features Limited customizations Not the best for larger businesses with a lot of traffic |
The second option is WordPress, a CMS (Content Management System), which empowers you to build a website with many options for customization and growth. WordPress, while beginner-friendly, does have a steeper learning curve than most website builders.
Many businesses depend on developers or designers to build their websites through WordPress, which can get pricey. However, WordPress also provides a myriad of ways to customize your site and thousands of free plugins that enable additional functionality.
| Pros | Cons |
| Fully customizable More adaptable Thousands of free plugins More SEOcapabilities | Can be more expensive (if hiring a freelancer or web developer) More time-consuming Steeper learning curve |
Both options have different pros and cons, so be sure to weigh them against your goals for your site to determine which one will provide the best vehicle for your aspirations. This guide will teach you how to build your website with either option.
To establish a successful website, it is crucial to understand the fundamental components of domains, hosting, and website design, which form the backbone of an effective online platform.
Your first step to building a website is picking a great domain name. Your domain name is vital because it's your reader's first impression of your business. It can help your customers feel confident they're in the right place or send them running.
Just imagine you're shopping for a new wallet, and one website domain is pollyspersonalizedwallets.com, while another is named s7754saam.wallet. Which website will you trust to enter your credit card information on?
When choosing your site's domain name, you want something short and simple that reflects your business and brand. Picking a domain name can be tricky, since over 350 million domain names are already registered. Fortunately, with a few tips and tricks, you can still find the perfect domain for your site.
Our top tips for selecting a domain name:
Once you have a domain name and have done research to ensure the name isn't already in use, you're ready to register it. You can do this on many sites, the most popular of which being Domain.com, Go Daddy, Blue Host, and Hostinger.

Searching for an available domain name and purchasing it on Domain.com
Your next step after registering your domain name is finding a web hosting provider. A web hosting service is where your website will live and be stored. There are a lot of different web hosting providers out there, so here are some key things to look for:
Once you've got your domain name and web hosting provider, we start to get into the fun part of website creation: designing your website. Think about one of your favorite websites that you visit regularly. What makes you love that site? One of the reasons you enjoy that site is likely because it's easy to use and navigate.
You don't typically think about a website's organization when using it. Still, it can make or break your experience with a website. So as you're creating your website, think through what pages you'll need to create and how they'll be connected.
Along with the architecture of your site, it should also be easy to use on a page level. Each page should be easy to read and navigate so visitors can quickly and efficiently accomplish their goals.
Now, with these steps completed, you're ready to start building your website using either a website builder or WordPress.
Website builders are sites that help you build your website. These are great for first-timers because you don't need design or coding experience to create a great website quickly.
Some website builders, like Wix or Squarespace, offer plans to build your website for free. So if you want to get a website up quickly and save money, then a website builder is the perfect option.
There are many website builders out there. Each serves different needs and business types, so look around and find the website builder that fits your business best. If you're a photographer, you'll want to find a website builder that is very visual and can handle loading your pictures quickly. If your business creates custom handbags, you'll want to find a website builder with great ecommerce plans.
Some popular website builders include:
Once you've selected the website builder you like, create an account and choose a plan. Initially, you may want to stick with a free account and get your website built for free. As you grow, you'll likely want to return to these plans and find the one that makes sense for your next growth stage.
Website builders provide thousands of templates to choose from. They typically organize templates based on industry, so look for a template that matches your business. You'll also want to consider your brand and look for a template matching your brand style. For example, if you sell vintage clothing and have a funky '70s vibe, then a modern-looking website won't work.
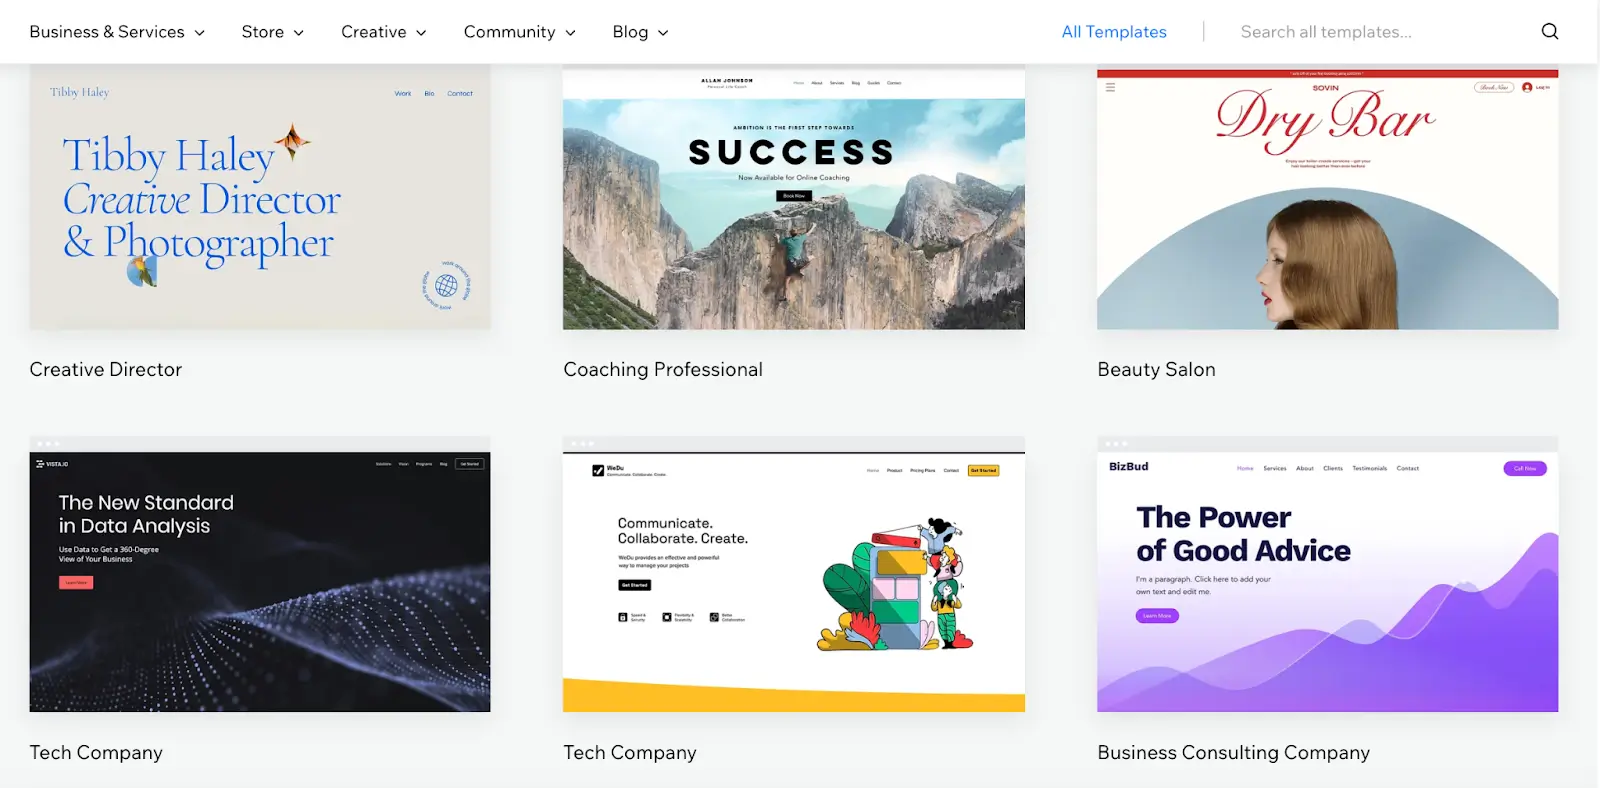
Template options and descriptions on Wix.com
If you're still looking for what you want, you can select a blank template and start from scratch.
Once you have your template or blank site, then you can work on customizing the layout and design to fit your needs. You can apply your brand colors and style to the template you choose. You can also move stuff around and start using your site's organization and structure.
Now that you have the bones of your website together, it's time to put some meat on it. Add your content, including text, images, and videos, to fill in and complete your website. You may need to adjust your layout or design as you add your content to your template to get things looking just how you'd like them.
On average, about six out of 10 of your visitors will be on their phones. With more than half your traffic being on a mobile device, ensuring your website looks good and works well on mobile is essential. Many website builders have mobile-responsive features built into their templates. Still, you'll want to check and make adjustments to ensure everything functions as it should on a mobile device.
Once you've added all your content and have your site ready to publish, you need to preview it and look for any bugs or issues to fix before going live. Put yourself in your customers' shoes and explore the site how a visitor might. Make sure that all the links and buttons work, all the text is readable, and your experience is smooth.
You can also ask friends and family to help test out your website. My favorite thing is to ask whoever is helping to test the site to try and break it, to stress-test it to uncover any weird bugs on your site. (It's better if your mom gets an error message when she tries to complete a purchase than one of your customers.)
Once you've worked out all the bugs and are ready to send your website into the world, hit ‘publish’.
WordPress is a free website builder because you purchase your domain name and web hosting provider outside of WordPress. It’s an excellent option for building your website because it is easier for a beginner to create one. Yet, it also has so many features and plugins that you can use to customize your site.
To get started, you'll need to install WordPress on your web hosting provider. Depending on your web hosting provider, they may have already installed WordPress for you. If not, you’ll need to look for an option to start building your site and popular apps. You should see WordPress as an option and click to install the app.
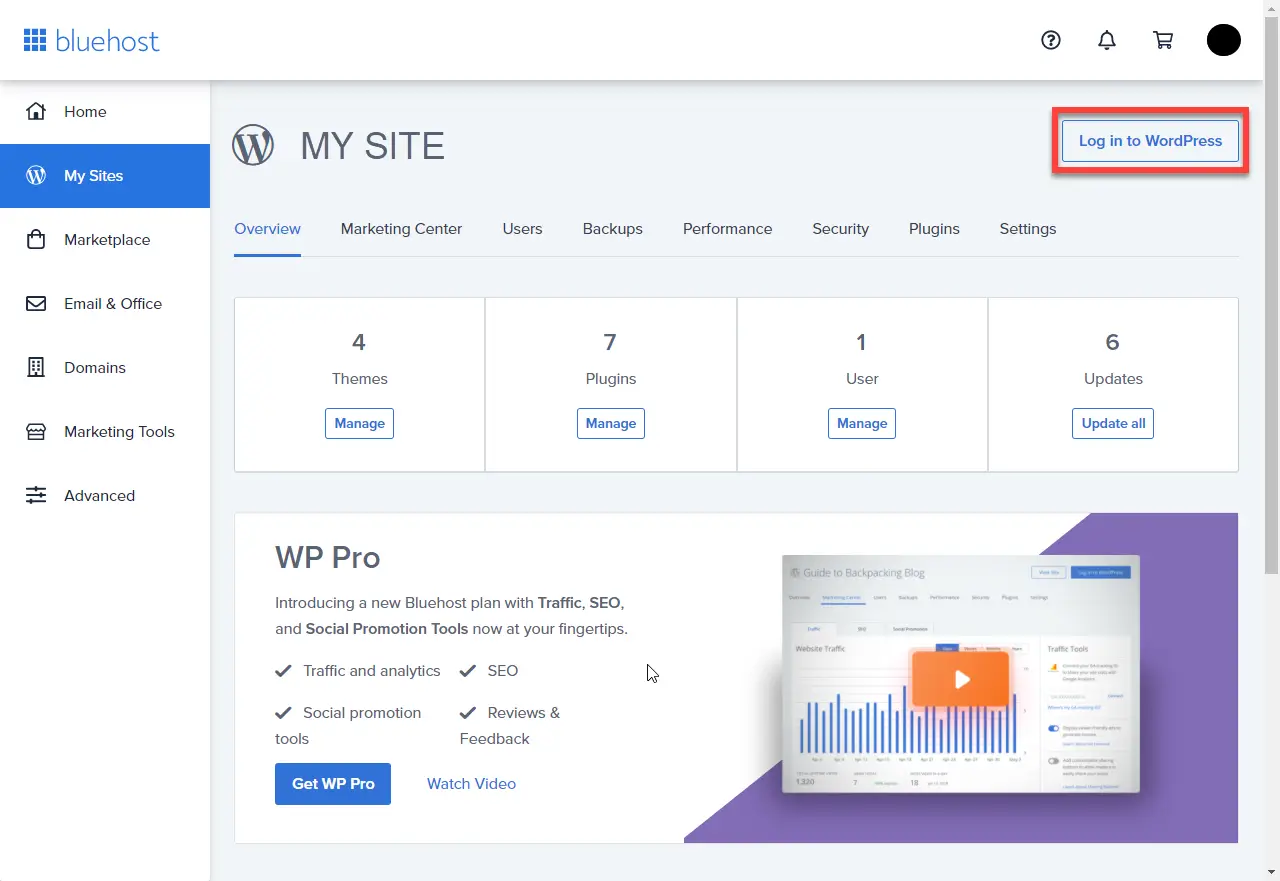
Logging into WordPress on Blue Host web hosting provider. Source: Blue Host
WordPress has thousands of different themes you can choose from, both paid and free. Browse through the themes to find the one that best fits your business needs and branding, but don't worry if it's not perfect. You'll be able to customize your template after installing it.
To find the themes in WordPress, go to Appearance > Themes in your dashboard and click the ‘add new’ button. Here you can search through the WordPress themes. When you've selected the theme you want, click ‘install’.
Now that you've installed your theme, you can customize it to suit your needs and brand better. Under the Appearance menu, you'll go to Customize, which will open the WordPress Customizer tool. Several default panels will allow you to customize the site title, logo, and colors.
In the Customizer tool, you can click on each panel and add your business information and design elements, like your logo and brand colors. There are also blue pencil icons on your screen that indicate other areas that you can customize on your site.
As you do this first pass, don't worry about getting things perfect right now. Next, we'll add some content to your website, which will help you to visualize your site better.
The two main types of content on a WordPress site are pages and posts. Pages are static, like your homepage, while posts are dynamic and will show up on your site based on the date on which you post them.
As a small business owner, you'll likely want to use pages for your homepage, about us, scheduling, and product pages. If you are building a blog or want to include a blog on your site, you'll want to use posts for those articles.
There are thousands of plugins you can add to your WordPress site. Plugins are software that adds different functionalities to your site. Some helpful plugins to consider are:
Think about your business goals and what functionalities will give your visitors the best experience, and search for plugins that will make your site function better and help you optimize your site.
Once your site is ready to launch, you'll want to test it from the point of view of your visitors. Look for anything that might need clarification or be easier to use or navigate. Ask family and friends to complete specific tasks on your site to see if they experience any bugs or confusion. That way, you can spot any problems and fix them before launching your site.
After you launch your site, you'll want to continue to update and maintain WordPress and your plugins.
Building and maintaining a website is essential to growing your business. As we’ve discussed, there are a couple of different ways to build a website, but the steps you'll need to take will always include:
After you get your site up, keep returning to it to find ways to improve and grow your website and business.
The information provided on this blog is for general informational purposes only, and should not be construed as business, legal, tax, accounting or financial advice. Readers should consult with a qualified professional before making any business, financial, or legal decisions. The views and opinions expressed in this blog are solely those of the authors and do not necessarily reflect the official policy, position, or endorsements of Lendio. While Lendio strives to keep its content current, it is accurate only as of the date posted. Business trends, financial conditions, regulations, and offers are subject to change without notice and may no longer be relevant or available. Lendio expressly disclaims all liability for any reliance placed on this information. By accessing this blog, you acknowledge and agree that Lendio shall not be held liable for any direct, indirect, incidental, consequential, or other damages arising from your use or reliance on the information provided.
Applying is free and won’t impact your credit1.

Ninety-nine percent of consumers search for and find small businesses on the internet. If you don't have a website, it can be challenging for your customers to learn about your business, and you'll be limited in the types of digital marketing promotions you can do. A website gives your audience a place to go and learn more about what you have to offer and buy your products—and that makes building a website for your business (if you haven’t already) a top priority for every business owner.
We'll cover two different ways you can build a website. Both have advantages and disadvantages, so your business goals will determine the best option.
The first option is a website builder—a program where you can quickly build a website without any design or coding experience needed. Website builders tend to be cheaper; some even offer free website plans. They typically have pre-made templates and drag-and-drop features to make it easier to create your website. However, despite being very beginner-friendly, website builders are typically limited when it comes to customizations and growth.
| Pros | Cons |
| Beginner-friendly No design or coding experience needed Less time-consuming Can be free or at least cheaper | Limited features Limited customizations Not the best for larger businesses with a lot of traffic |
The second option is WordPress, a CMS (Content Management System), which empowers you to build a website with many options for customization and growth. WordPress, while beginner-friendly, does have a steeper learning curve than most website builders.
Many businesses depend on developers or designers to build their websites through WordPress, which can get pricey. However, WordPress also provides a myriad of ways to customize your site and thousands of free plugins that enable additional functionality.
| Pros | Cons |
| Fully customizable More adaptable Thousands of free plugins More SEOcapabilities | Can be more expensive (if hiring a freelancer or web developer) More time-consuming Steeper learning curve |
Both options have different pros and cons, so be sure to weigh them against your goals for your site to determine which one will provide the best vehicle for your aspirations. This guide will teach you how to build your website with either option.
To establish a successful website, it is crucial to understand the fundamental components of domains, hosting, and website design, which form the backbone of an effective online platform.
Your first step to building a website is picking a great domain name. Your domain name is vital because it's your reader's first impression of your business. It can help your customers feel confident they're in the right place or send them running.
Just imagine you're shopping for a new wallet, and one website domain is pollyspersonalizedwallets.com, while another is named s7754saam.wallet. Which website will you trust to enter your credit card information on?
When choosing your site's domain name, you want something short and simple that reflects your business and brand. Picking a domain name can be tricky, since over 350 million domain names are already registered. Fortunately, with a few tips and tricks, you can still find the perfect domain for your site.
Our top tips for selecting a domain name:
Once you have a domain name and have done research to ensure the name isn't already in use, you're ready to register it. You can do this on many sites, the most popular of which being Domain.com, Go Daddy, Blue Host, and Hostinger.
Searching for an available domain name and purchasing it on Domain.com
Your next step after registering your domain name is finding a web hosting provider. A web hosting service is where your website will live and be stored. There are a lot of different web hosting providers out there, so here are some key things to look for:
Once you've got your domain name and web hosting provider, we start to get into the fun part of website creation: designing your website. Think about one of your favorite websites that you visit regularly. What makes you love that site? One of the reasons you enjoy that site is likely because it's easy to use and navigate.
You don't typically think about a website's organization when using it. Still, it can make or break your experience with a website. So as you're creating your website, think through what pages you'll need to create and how they'll be connected.
Along with the architecture of your site, it should also be easy to use on a page level. Each page should be easy to read and navigate so visitors can quickly and efficiently accomplish their goals.
Now, with these steps completed, you're ready to start building your website using either a website builder or WordPress.
Website builders are sites that help you build your website. These are great for first-timers because you don't need design or coding experience to create a great website quickly.
Some website builders, like Wix or Squarespace, offer plans to build your website for free. So if you want to get a website up quickly and save money, then a website builder is the perfect option.
There are many website builders out there. Each serves different needs and business types, so look around and find the website builder that fits your business best. If you're a photographer, you'll want to find a website builder that is very visual and can handle loading your pictures quickly. If your business creates custom handbags, you'll want to find a website builder with great ecommerce plans.
Some popular website builders include:
Once you've selected the website builder you like, create an account and choose a plan. Initially, you may want to stick with a free account and get your website built for free. As you grow, you'll likely want to return to these plans and find the one that makes sense for your next growth stage.
Website builders provide thousands of templates to choose from. They typically organize templates based on industry, so look for a template that matches your business. You'll also want to consider your brand and look for a template matching your brand style. For example, if you sell vintage clothing and have a funky '70s vibe, then a modern-looking website won't work.
Template options and descriptions on Wix.com
If you're still looking for what you want, you can select a blank template and start from scratch.
Once you have your template or blank site, then you can work on customizing the layout and design to fit your needs. You can apply your brand colors and style to the template you choose. You can also move stuff around and start using your site's organization and structure.
Now that you have the bones of your website together, it's time to put some meat on it. Add your content, including text, images, and videos, to fill in and complete your website. You may need to adjust your layout or design as you add your content to your template to get things looking just how you'd like them.
On average, about six out of 10 of your visitors will be on their phones. With more than half your traffic being on a mobile device, ensuring your website looks good and works well on mobile is essential. Many website builders have mobile-responsive features built into their templates. Still, you'll want to check and make adjustments to ensure everything functions as it should on a mobile device.
Once you've added all your content and have your site ready to publish, you need to preview it and look for any bugs or issues to fix before going live. Put yourself in your customers' shoes and explore the site how a visitor might. Make sure that all the links and buttons work, all the text is readable, and your experience is smooth.
You can also ask friends and family to help test out your website. My favorite thing is to ask whoever is helping to test the site to try and break it, to stress-test it to uncover any weird bugs on your site. (It's better if your mom gets an error message when she tries to complete a purchase than one of your customers.)
Once you've worked out all the bugs and are ready to send your website into the world, hit ‘publish’.
WordPress is a free website builder because you purchase your domain name and web hosting provider outside of WordPress. It’s an excellent option for building your website because it is easier for a beginner to create one. Yet, it also has so many features and plugins that you can use to customize your site.
To get started, you'll need to install WordPress on your web hosting provider. Depending on your web hosting provider, they may have already installed WordPress for you. If not, you’ll need to look for an option to start building your site and popular apps. You should see WordPress as an option and click to install the app.
Logging into WordPress on Blue Host web hosting provider. Source: Blue Host
WordPress has thousands of different themes you can choose from, both paid and free. Browse through the themes to find the one that best fits your business needs and branding, but don't worry if it's not perfect. You'll be able to customize your template after installing it.
To find the themes in WordPress, go to Appearance > Themes in your dashboard and click the ‘add new’ button. Here you can search through the WordPress themes. When you've selected the theme you want, click ‘install’.
Now that you've installed your theme, you can customize it to suit your needs and brand better. Under the Appearance menu, you'll go to Customize, which will open the WordPress Customizer tool. Several default panels will allow you to customize the site title, logo, and colors.
In the Customizer tool, you can click on each panel and add your business information and design elements, like your logo and brand colors. There are also blue pencil icons on your screen that indicate other areas that you can customize on your site.
As you do this first pass, don't worry about getting things perfect right now. Next, we'll add some content to your website, which will help you to visualize your site better.
The two main types of content on a WordPress site are pages and posts. Pages are static, like your homepage, while posts are dynamic and will show up on your site based on the date on which you post them.
As a small business owner, you'll likely want to use pages for your homepage, about us, scheduling, and product pages. If you are building a blog or want to include a blog on your site, you'll want to use posts for those articles.
There are thousands of plugins you can add to your WordPress site. Plugins are software that adds different functionalities to your site. Some helpful plugins to consider are:
Think about your business goals and what functionalities will give your visitors the best experience, and search for plugins that will make your site function better and help you optimize your site.
Once your site is ready to launch, you'll want to test it from the point of view of your visitors. Look for anything that might need clarification or be easier to use or navigate. Ask family and friends to complete specific tasks on your site to see if they experience any bugs or confusion. That way, you can spot any problems and fix them before launching your site.
After you launch your site, you'll want to continue to update and maintain WordPress and your plugins.
Building and maintaining a website is essential to growing your business. As we’ve discussed, there are a couple of different ways to build a website, but the steps you'll need to take will always include:
After you get your site up, keep returning to it to find ways to improve and grow your website and business.